Application
Dashboard
ExSI offers several application monitoring features.
To access these features, go to the homepage and click one of the environments for the application you’re interested in.
This gives you access to the application’s resources and status.
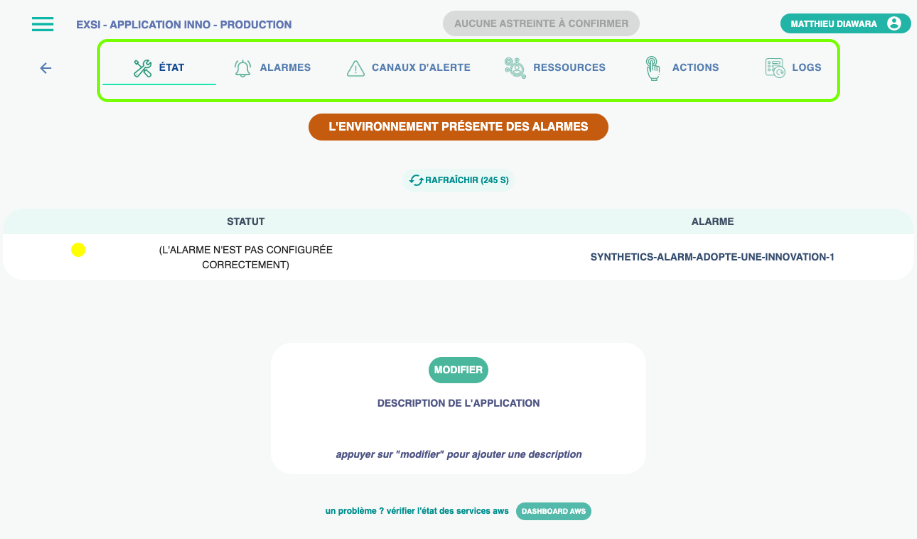
Alarms
An alarm marked as “not configured correctly” requires your attention and an action so it can be acknowledged and report the alarm’s actual state. For an alarm to be visible, it must be configured in the AWS CloudWatch service with the OKAction and ALARMAction variables pointing to the following three SNS topics:
Example from a Terraform .tf file
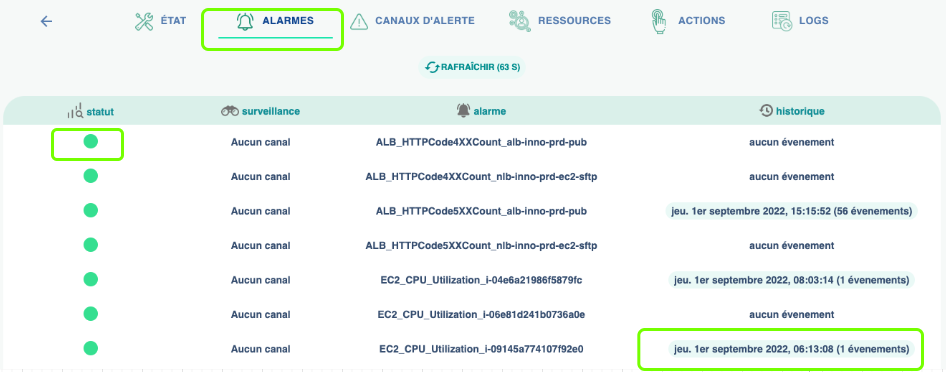
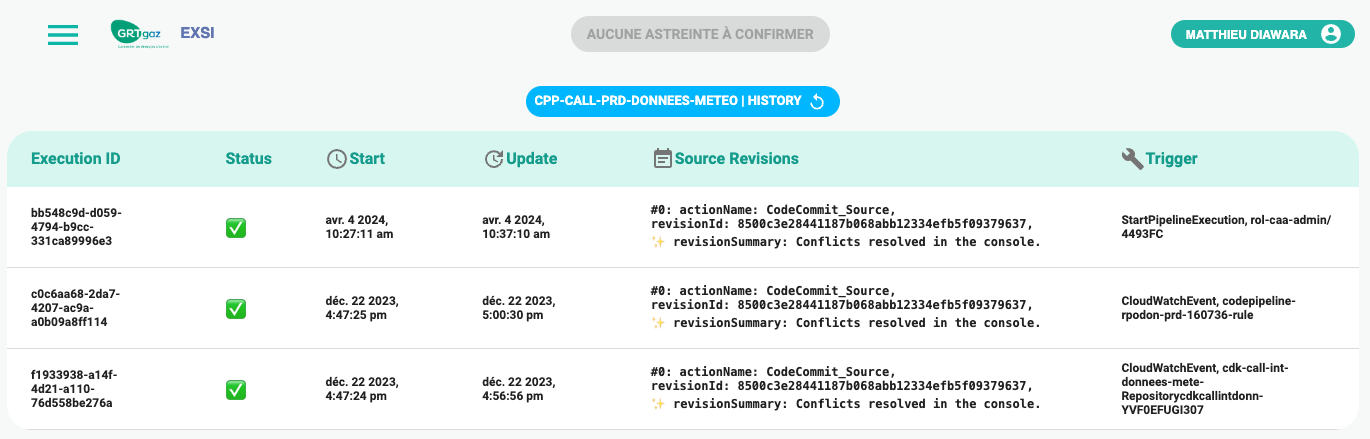
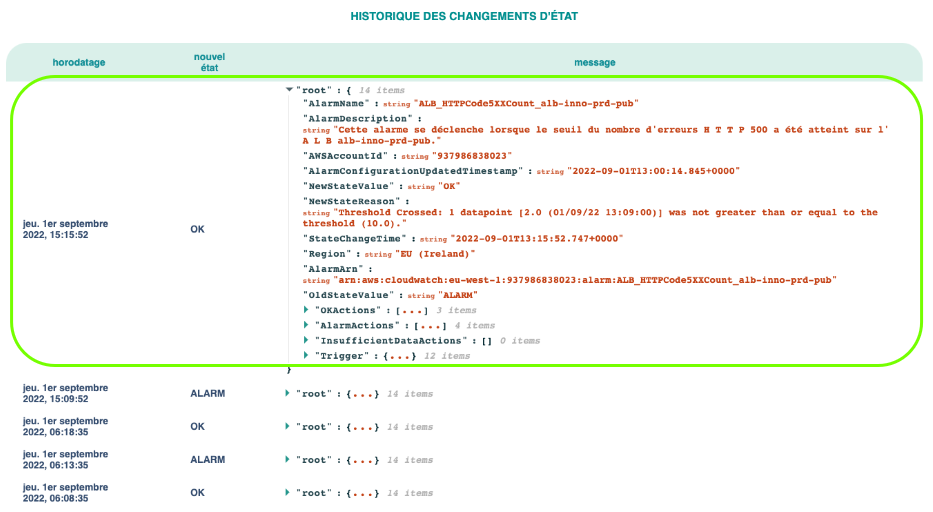
Vous pouvez accéder à l'historique des 3 dernières semaines d'une alarme en cliquant à droite sur les dates d'évènements
Attention, seuls les 200 derniers évènements sont affichés
Notification Channels
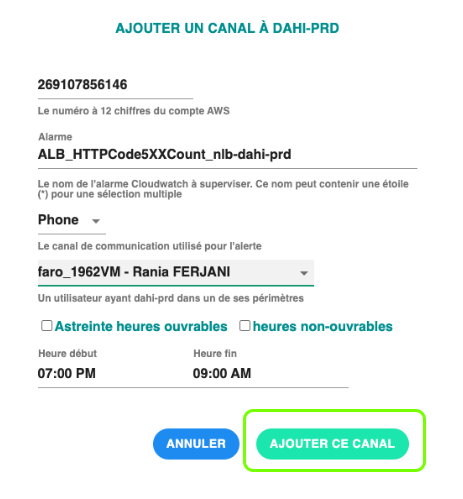
When you add a channel, you’ll see the following interface, where you must enter the name of the alarm to monitor:
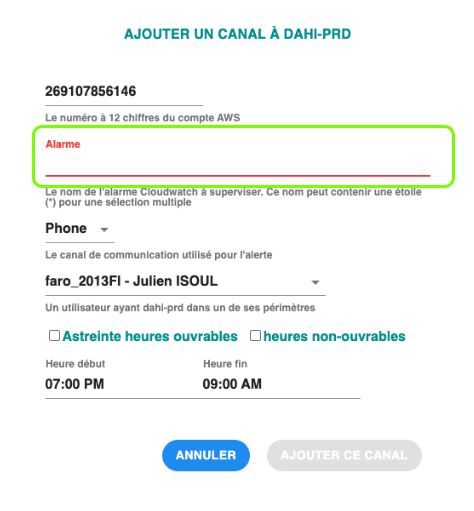
The current application is already selected.
Then expand the Phone, Email, or SMS options and choose the communication method for this channel.
Select the user for this alert.
Specify whether this channel applies during business hours (HO) or outside business hours (HNO).
Choose the relevant time window.
Confirm by clicking “Add this channel.”
If you add an On-Call HO or HNO channel, the associated user will be updated automatically whenever the on-call roster changes for the scope.
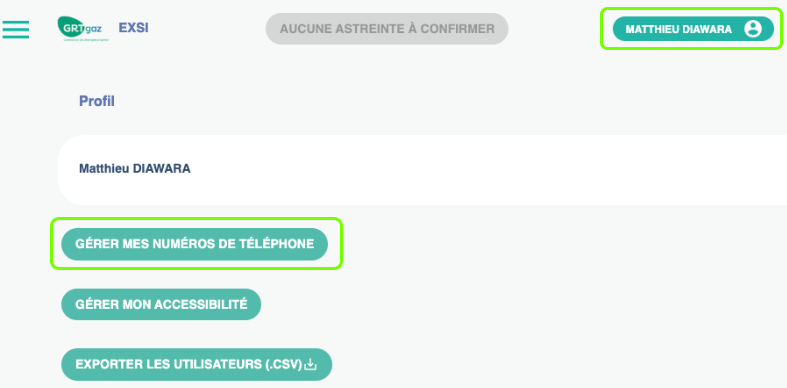
To add a phone channel, open the User Profile panel:
Resources
The Resources tab displays a set of AWS services and resources commonly used by your application.
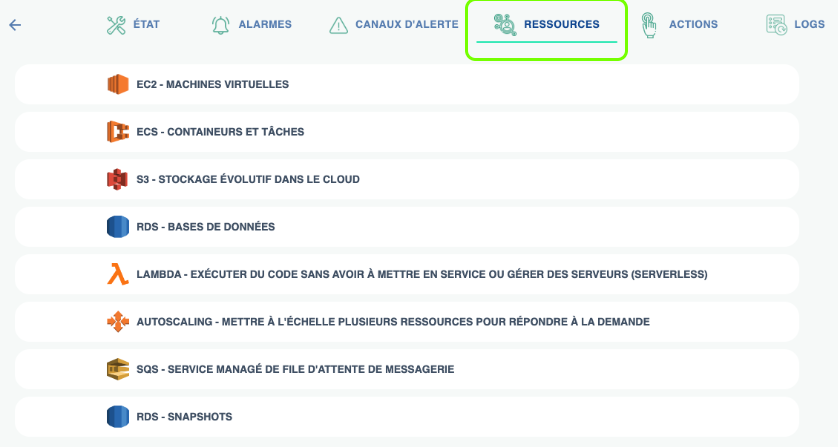
Click a service to view the details of the related resources.
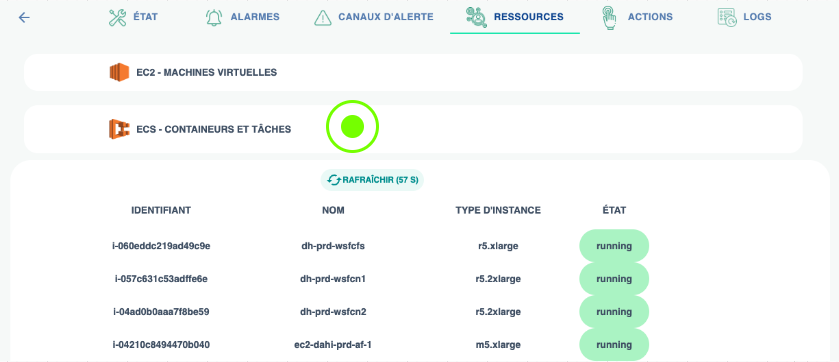
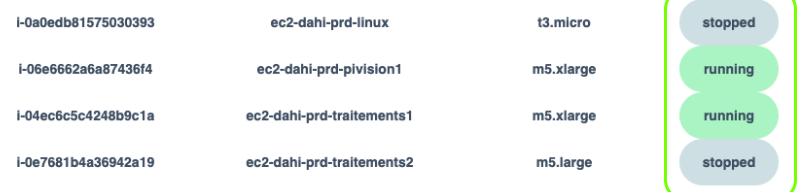
For resources of type EC2, ECS, and RDS, a specific color indicates the resource state:
Green: the resource is running normally.
Gray: the resource is stopped or in a transitional state (updating, etc.).
Yellow: the resource is terminated, unavailable, etc.
Lambdas Actions
An action is the execution of a Lambda equipped with EXSI environment variables. As a reminder, an environment variable always has the form KEY: VALUE.
Required environment variables:
EXSI: <The display name of the action>
EXSI_NOTICE: <An additional message to display to the user>
EXSI_EXEC_MODE: SYNC
Important: Lambdas are prefixed with laf-xxx-xxx and roles with rol-
The Lambda must also return an object such as:
After the action is launched, the message displayed in EXSI shows the Lambda’s execution result: "success" or "error".
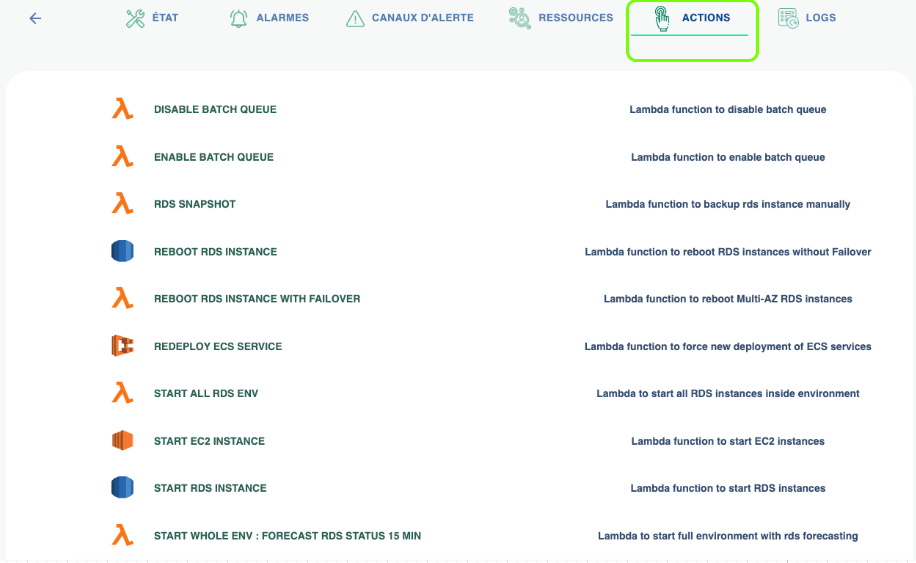
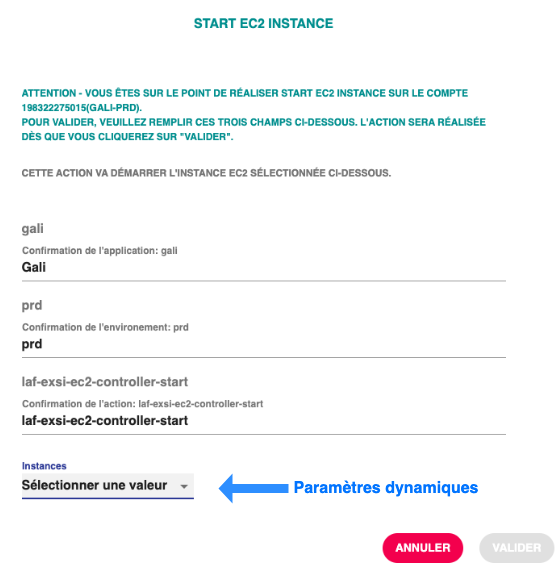
By clicking an action, you can access its basic parameters:
Application confirmation
Environment confirmation
Action confirmation
Lists (dropdowns)
Inputs (text fields)
This action is designed to stop or start an EC2 instance. To be eligible for start/stop, the EC2 instance must have the tag StopStart: TRUE (tag key StopStart, value TRUE).
This action is deployed with the default configuration, so it should appear automatically in your environment.
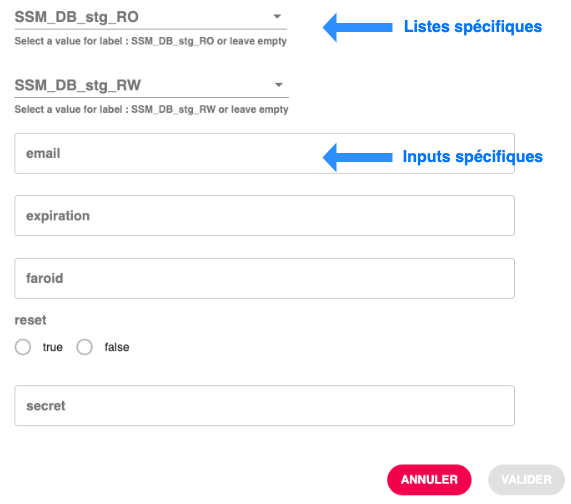
Dynamic parameters:
Structure: param_<paramName>: serviceName::serviceCall::callResponseKey::listPropertyToMap
Based on the normalized structure of Boto3 (the AWS Python SDK). Dynamic parameters can be added to an action via a Lambda’s environment variables.
Example (Auto Scaling Group selector): param_AutoScalingGroupName: autoscaling::describe_auto_scaling_groups::AutoScalingGroups::AutoScalingGroupName
Here, param_AutoScalingGroupName is the KEY,
and
autoscaling::describe_auto_scaling_groups::AutoScalingGroups::AutoScalingGroupName is the VALUE.
An environment variable is written as KEY = "VALUE", or in a Terraform module as KEY = "${ var.KEY }".
From a Terraform .tf file (example):
From a Terraform .tf file (example):
Dependency parameters:
For example:
Specific inputs:
Structure: input_InputName: default value
The default value will be displayed to the user and can be used if the user does not change it.
Following the same principle, in addition to dynamic parameters, ExSI lets you define inputs for an action by adding an environment variable to your Lambda, as in this example:
The input is a string. The default value corresponds to the value given to the environment variable.
You can then retrieve this input in the Lambda as follows:
IMPORTANT: The name of each input and each dynamic parameter must be unique.
If you need help defining your parameters and inputs, don’t hesitate to contact us at: Set up a chatbot.
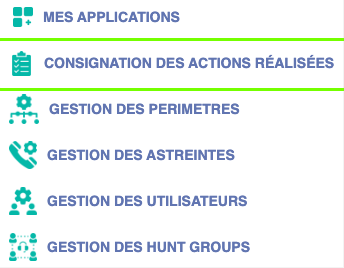
ACTION LOGGING
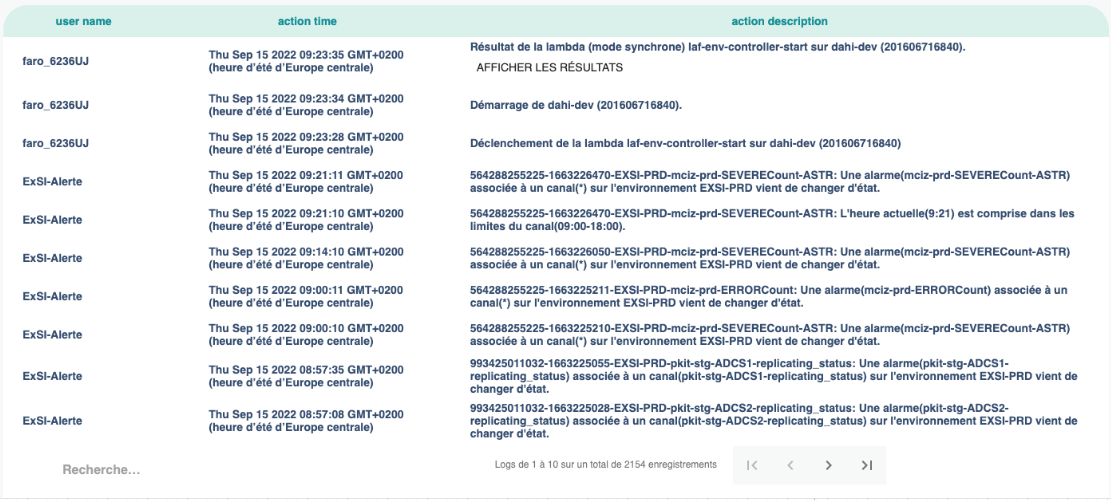
In the dropdown menu, you’ll find the history of all actions performed on or by ExSI.
The actions performed can be of two types:
Automatic actions — natively triggered in response to certain events related to the operation of one or more applications. For example, you’ll find the history of alarm state changes.
User actions — performed by a user from the ExSI interface. For example, you’ll find the history of logins and the addition or removal of on-call assignments.
Pipelines
Approvals
Access the list of pipelines for your account by clicking on:

Currently, only pipelines deployed within the past year in the shar-prod account that follow the naming convention below are accessible from EXSI:
PIP-PROJECTNAME-...
PIP-PROJECTNAME-STAGE-...
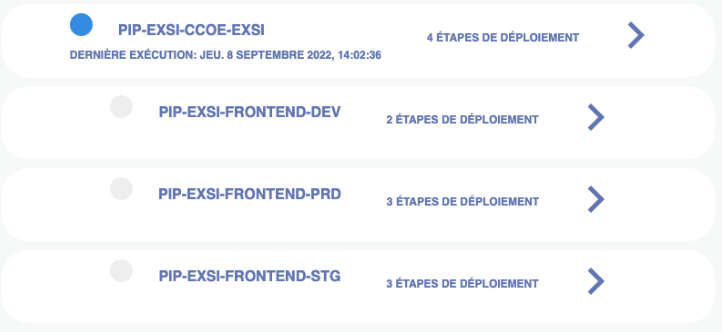
Manually approve a validation step on a deployment pipeline. If the pipeline requires approval, you can add a message describing the release and either approve or reject it. If the pipeline does not require approval, you will simply see the different pipeline stages without the ability to act on them.
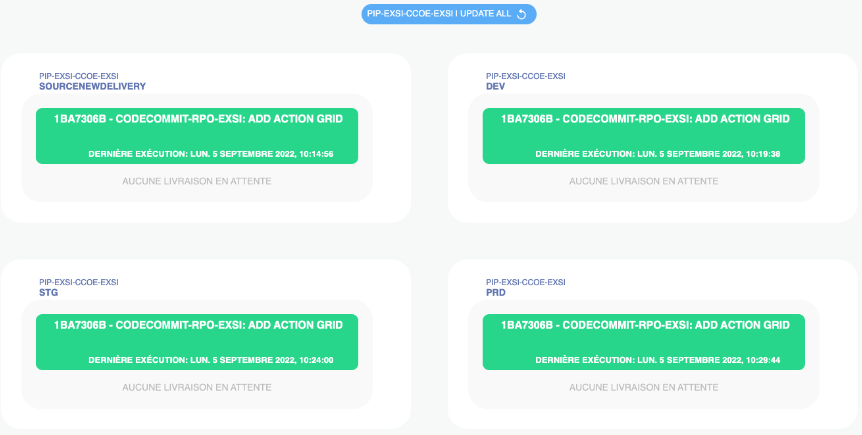
Each card corresponds to an environment (DEV, STG, PRD).
Inside each card, green shows the latest version whose deployment succeeded.
If a new deployment is available, you’ll see the new version in a blue card.
If a deployment problem occurred, the failed version appears in a red card.
You can request a new deployment attempt to clear a failure; you will then see the approval request again.
You can refresh the page at any time to fetch the latest information by clicking the blue circular arrow next to the pipeline name.

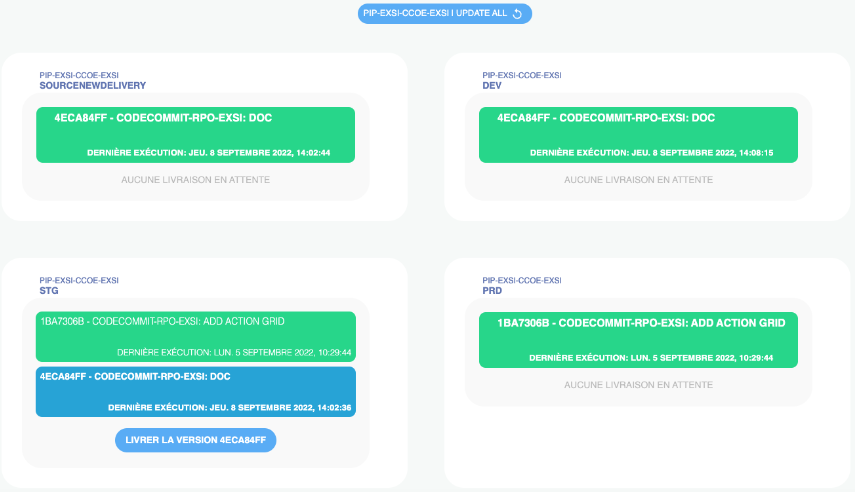
Manual Approval: When a release is available for an environment—such as STG in the image below—you can approve the release. In that environment, the green version is the most recent successful delivery, and the blue version is the one you are about to deliver. To deliver the new version to an environment, simply click the blue “Deliver version” button.
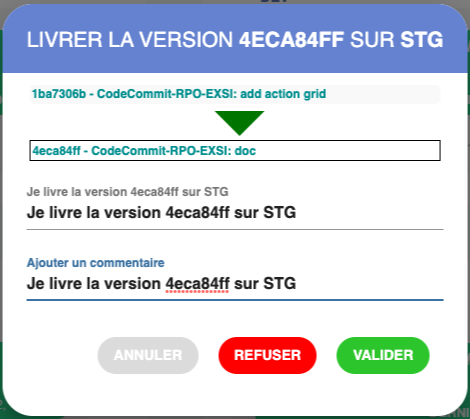
Approval Notification: After clicking the blue “Deliver version XXXXX” button, a dialog appears. This dialog shows the current version at the top (e.g., 1ba7306b in the example) and the version to be applied below (e.g., 4eca84ff).
Copy the approval message — “I approve the delivery of version XXXX to XXX.” — and add an approval comment. Then click Validate to trigger the delivery automatically. You can refresh the pipeline page to check the status.
You can also reject a delivery; it will then appear in red after the page is refreshed.
AWS CodePipeline configuration
AWS CodePipeline pipelines can be added to EXSI by following this naming rule:
To validate a DEV, STG, or PROD stage, two pieces of information are required:Manual Approval
NotificationArn
Where Manual Approval corresponds to the Approve action shown above, and NotificationArn is the SNS topic that EXSI uses to notify the pipeline of the manual approval.
EXSI DevOps reminder: Manual Approval and NotificationArn are always required for pipelines defined in a Terraform file.